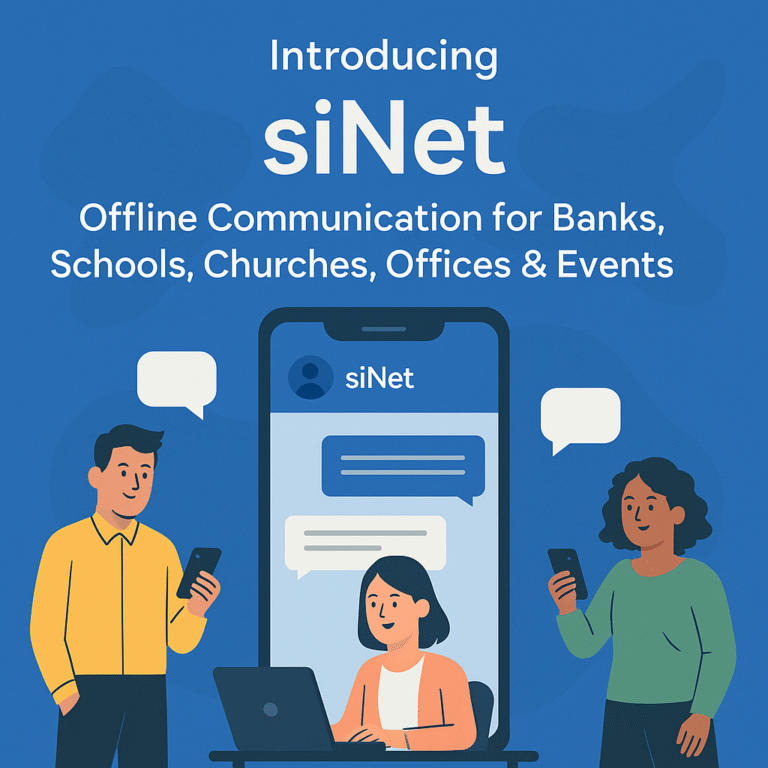

siNEt Help & Documentation
siNEt Documentation & Setup Guide
Your guide to installing, using, and understanding siNEt.
Table of Contents
🚀Getting Started with siNEt: A Simple Guide
Follow these steps to get siNEt running smoothly for your group.
1. The siNEt Host (Server Setup – For One Person)
Imagine you’re in a bank, school, church, or any group that wants to chat locally. Here’s how to start:
- One Person Installs: Only one person in your group needs to download and install the siNEt application. This computer becomes the “host machine” or “server machine”.
- Become the “Default Admin”: This host person must set their username as “admin” (not case-sensitive) when first running siNEt. This gives them special privileges.
- The Server IP: The host machine has a local network IP address (e.g., 192.168.1.XX). The admin will find this IP (see FAQ below) and share it.
2. Connecting Everyone Else (Client Setup – For All Other Users)
Once the host machine is set up by the “admin”:
- No Installation Needed: Other members do NOT need to install siNEt.
- Use Any Web Browser: They open their preferred web browser.
- Enter the Server IP: In the browser’s address bar, they type the Server IP address of the host machine, followed by
:9002(e.g.,https://192.168.1.105:9002). - Set Your Unique Username: When siNEt loads, they set their own unique username. They should NOT use “admin”.
3. Sharing the Same Network (The Magic Behind siNEt)
For siNEt to work, everyone needs to be connected to the same local network:
- Same Wi-Fi or Hotspot: All users must be on the same Wi-Fi network or mobile hotspot.
- No Internet Required (for Chat): Core chat features work entirely within your local network. AI features and checking for updates online do require internet.
The Administrator (Admin) Role in Detail
The Administrator (user “admin” on the host machine) is crucial for setup and management. They are the custodian of your organization’s siNEt instance.
Admin Responsibilities & Privileges:
- Initial Server Setup: Installing siNEt, ensuring it runs, and communicating the Server IP.
- Global Server IP (Default Admin): Can set a “Global Default Server IP” via sidebar settings.
- Voluntary Registration (Default Admin): Optionally provides anonymous info to help improve siNEt.
- Application Updates: Downloads new versions from the official website and upgrades the server installation.
- User Management: Can add/remove users (with some restrictions).
- Admin Rights Management (Default Admin): Can grant/revoke admin privileges to other users.
- Channel Moderation: Can pin/unpin messages and delete messages in “General Discussion”.
Who should be the Admin? Ideally, someone with basic technical understanding to manage the application, perform updates, and assist users. For example, an IT teacher or a tech-savvy staff member.
🛠️Installation Guide (for Server Admin)
This guide walks you through setting up your siNEt 0.1.0 package and its chat server on a dedicated server machine on your Local Area Network (LAN). This is typically done by one person (the Administrator).
Download the siNEt package first: Download siNEt 0.1.0
A. Prerequisites (One-Time Setup)
Before you begin, ensure the following are set up on your server machine. You usually only need to do this once.
-
Node.js and npm:
- Why?: siNEt is built using Node.js, a JavaScript runtime. npm (Node Package Manager) comes with Node.js and helps manage siNEt’s components.
- How?:
- Visit the official Node.js website: nodejs.org.
- Download the LTS (Long Term Support) version recommended for most users.
- Run the installer and follow the on-screen instructions. This will install both Node.js and npm.
- To check if it’s installed, open your Command Prompt (Windows) or Terminal (macOS/Linux) and type:
node -vthen press Enter, andnpm -vthen press Enter. You should see version numbers.
-
PM2 (Optional, but Highly Recommended):
- Why?: PM2 is a process manager. It helps keep your siNEt application and chat server running smoothly in the background, automatically restarting them if they crash, and makes managing them easier.
- How?:
- Open your Command Prompt (Windows) or Terminal (macOS/Linux).
- Type the following command and press Enter:
npm install pm2 -g - Note for macOS/Linux users: If you get a permission error, you might need to use
sudo:
You’ll be asked for your computer’s password.sudo npm install pm2 -g - PM2 is now installed globally on your system.
B. siNEt Server Setup Steps
Follow these instructions on your siNEt server machine (the computer that will host the chat):
-
Download and Extract the siNEt 0.1.0 Package:
- If you haven’t already, download the
sinet-0.1.0.zip(or similar named) package from the link above. - Extract its contents. For example, you can extract it to your Desktop. You will have a folder named
sinet-0.1.0.
- If you haven’t already, download the
-
Navigate to Your Project Directory:
- Open your Command Prompt (on Windows, search for “cmd”) or Terminal (on macOS, find it in Applications > Utilities; on Linux, it’s usually readily available).
- You need to tell the command line to go into the extracted
sinet-0.1.0folder.- If you extracted it to your Desktop, you would typically type:
And press Enter. (The exact command might vary slightly based on your username and OS language settings for “Desktop”).cd Desktop/sinet-0.1.0 - If it’s elsewhere, use the
cdcommand followed by the correct path to thesinet-0.1.0folder.
- If you extracted it to your Desktop, you would typically type:
-
Running siNEt (Server + Application):
You do NOT need to run
npm installornpm run buildwith this siNEt package.Option A: Using PM2 (Highly Recommended)
- Inside the
sinet-0.1.0directory in your command prompt/terminal, type:
And press Enter. This will start both the siNEt web app and the chat server using PM2.npm run pm2:start - Managing siNEt with PM2:
pm2 list(Show status of running apps)npm run pm2:logs(View web app logs)npm run pm2:logs:ws(View chat server logs)npm run pm2:stop(Stop siNEt)
Option B: Running Manually (For Testing)
- You’ll need two command prompt/terminal windows, both navigated into the
sinet-0.1.0folder. - Terminal Window 1: Start the siNEt Web Application
(It will try to use port 9002)npm start - Terminal Window 2: Start the WebSocket Chat Server
(It will try to use port 8080)npm run ws:start - Keep both terminals open. If you close them, siNEt will stop.
- Inside the
-
Identify Your Server Machine’s Local IP Address:
- Find your server’s LAN IP (e.g.,
192.168.1.XX).- Windows: Open Command Prompt, type
ipconfig, press Enter. Look for ‘IPv4 Address’. - macOS: System Settings > Network. Select active connection.
- Linux: Open Terminal, type
hostname -Iorip addr.
- Windows: Open Command Prompt, type
- This IP address is what other users will need to connect to siNEt.
- Find your server’s LAN IP (e.g.,
-
Configure Your Server’s Firewall:
- Allow incoming TCP connections on:
- Port 9002: For the siNEt web application.
- Port 8080: For the WebSocket chat server.
- Consult your OS/firewall documentation. For example, on Windows, search for “Windows Defender Firewall with Advanced Security” and create new inbound rules.
- Allow incoming TCP connections on:
C. (IMPORTANT for Voice Messages) Setup SSL Certificates for HTTPS & WSS
For features like voice recording to work reliably across your LAN (not just on localhost), siNEt needs to be served over HTTPS, and the WebSocket server over WSS (Secure WebSockets). This requires SSL certificates. For a LAN, self-signed certificates are common. If you don’t need voice messaging or other features requiring HTTPS, you might be able to skip this, but users may see “Not Secure” warnings in their browser.
-
Check/Install OpenSSL:
- Why?: OpenSSL is a tool used to create SSL certificates.
- How?:
- macOS/Linux: OpenSSL is usually pre-installed. Open Terminal and type
openssl version. If you see a version number, it’s installed. - Windows: OpenSSL is not installed by default.
- You can download a precompiled OpenSSL installer for Windows from sites like slproweb.com/products/Win32OpenSSL.html (choose a “Win64 OpenSSL Light” version, for example).
- Install it. During installation, it might ask if you want to copy OpenSSL DLLs to the Windows system directory or the OpenSSL binaries directory. Choosing the OpenSSL binaries directory is often safer.
- After installation, you might need to add the OpenSSL installation directory (e.g.,
C:\Program Files\OpenSSL-Win64\bin) to your system’s PATH environment variable to runopensslfrom any command prompt location. (Search Windows for “edit environment variables for your account”). This can be tricky for non-technical users.
Alternatively, after installing OpenSSL, open Command Prompt and navigate directly to the OpenSSL ‘bin’ directory (e.g.,cd "C:\Program Files\OpenSSL-Win64\bin") before running theopenssl reqcommand below.
- macOS/Linux: OpenSSL is usually pre-installed. Open Terminal and type
-
Navigate to your
sinet-0.1.0application directory (if not already there):cd path/to/your/sinet-0.1.0 -
Create a
certsdirectory:mkdir certs cd certs -
Generate Self-Signed Certificates using OpenSSL:
Inside the
certsdirectory in your command prompt/terminal, run:openssl req -x509 -newkey rsa:4096 -keyout key.pem -out cert.pem -days 365 -nodes -subj "/CN=sinet.local"- This creates
key.pem(private key) andcert.pem(certificate) valid for 365 days. -subj "/CN=sinet.local"sets a Common Name. You can use your server’s actual hostname if it’s resolvable on your LAN, or just a placeholder like `sinet.local`. If users access via IP, they’ll still get a browser warning.- You might be asked some questions (country, organization, etc.). You can press Enter to accept defaults or fill them as you see fit for a self-signed certificate.
- This creates
-
Return to the main
sinet-0.1.0directory:
Yourcd ..key.pemandcert.pemshould now be in thesinet-0.1.0/certsfolder. -
Restart siNEt:
- If you used PM2:
npm run pm2:restart - If you ran manually: Close both terminal windows (Ctrl+C) and restart them using
npm startandnpm run ws:start.
- If you used PM2:
💻Client Setup (For Other Users on the LAN)
- Ensure Network Connectivity: Clients must be on the same LAN as the server machine.
- Open a Web Browser.
-
Navigate to siNEt:
- If HTTPS is running (certs were generated):
https://<SERVER_MACHINE_IP>:9002 - If HTTP fallback is running:
http://<SERVER_MACHINE_IP>:9002 - (Replace
<SERVER_MACHINE_IP>with the server’s actual local IP).
- If HTTPS is running (certs were generated):
- Enter Server IP in siNEt (if prompted): When siNEt loads, it may prompt for “Server IP”. Users enter the same
<SERVER_MACHINE_IP>. - Set Username and Chat! Microphone access should now work if connected via HTTPS.
🌐siNEt Connects Your Team, Your Way: How it Works on Your Network
siNEt is designed to be incredibly flexible. It works using the standard network your computers and devices are already on!
The core idea: siNEt uses your existing Local Area Network (LAN) – the connections already linking your devices in one place (like an office, school, or home). If your devices can “see” each other on this local network, siNEt can connect them.
Common Network Setups:
- Wired Ethernet LAN: Computers plugged into the network with Ethernet cables. The siNEt server gets a local IP (e.g.,
192.168.1.50), and others use that to connect. - Standard Wi-Fi Network: Everyone connected to the same Wi-Fi router as the siNEt server can join.
- Mobile Hotspots: A smartphone creates a private Wi-Fi network. The siNEt server and other users connect to this hotspot. The hotspot itself doesn’t need internet data for siNEt’s core chat.
- Combined Wired & Wireless LANs: A router offers both Ethernet and Wi-Fi. As long as all devices are on the same network managed by that router, siNEt works for everyone.
It’s Simple:
- Connect Your Device: You first connect your computer/phone to your local network (choose Wi-Fi, plug in cable).
- Tell siNEt Where to Go: Open siNEt in your browser and provide the local IP address of the computer running the siNEt server software.
❓Frequently Asked Questions
:9002 in their browser) to join the chat. This IP is identified and communicated by the Administrator.
Windows: Open Command Prompt (search for ‘cmd’), type ipconfig, and press Enter. Look for the ‘IPv4 Address’ under your active network adapter (e.g., Wi-Fi or Ethernet).
macOS: Go to System Settings > Network. Select your active connection (e.g., Wi-Fi) from the list. Your IP address will be displayed there.
Linux: Open a terminal and type hostname -I or ip addr.
- Check Network: Ensure your device is on the same Wi-Fi network or LAN segment as the server machine.
- Verify Server IP: Double-check that the Server IP address (and port
:9002) you entered in your browser is correct. Make sure to includehttp://orhttps://. - Server Running: Make sure the siNEt application and the WebSocket server are running on the server machine. The Admin should verify this.
- Firewall Issues: The firewall on the server machine might be blocking connections for port 9002 (TCP) and port 8080 (TCP).
- HTTPS Warning (Self-Signed Certs): If using HTTPS with self-signed certificates, users will see a browser warning. They must click “Advanced” and “Proceed” to access siNEt.
However, the “Suggest Replies with AI” feature and checking for application updates by visiting our website do require an internet connection.
- Privacy & Data Control: Messages and files stay within your local network, not on third-party cloud servers.
- No Internet Required (for Core Chat): Works even if your internet is down.
- Reduced External Dependencies: Your communication isn’t dependent on external service providers.
- Speed & Low Latency: Direct LAN communication is often faster.
- Focused Communication: Designed for your internal team, reducing external distractions.
- Cost-Effective: Freeware for core local chat.
- Customizable & Controllable: Admins have more direct control.
ℹ️About siNEt & PauTeCom Technologies
siNEt is proudly developed by PauTeCom Technologies. It is provided as freeware.
Our Mission: Streamlined Local Communication
At PauTeCom Technologies, we believe in empowering secure, efficient, and focused communication. siNEt aims to provide a dedicated, real-time communication tool that operates seamlessly within your Local Area Network (LAN), fostering a more productive and less disruptive workplace.
How siNEt Transforms Your Workplace & Use Cases
- Reduce Physical Distractions & Save Time: Get help via quick DMs or group messages.
- Enhance Internal Collaboration: Private, secure channel for corporate offices and teams.
- Boost Productivity in Any Environment: Perfect for areas with limited or no internet.
- Maintain Data Privacy: Keep sensitive conversations and files strictly local.
- Empower Educational Institutions: Facilitate communication within school networks.
- Agile Project Coordination: Quickly set up communication hubs for temporary teams.
siNEt Software License Agreement

(Free Use – Proprietary License)
Copyright © PauTeCom Technologies

Effective Date: [June 2025]

This End User License Agreement ("Agreement") is a legal agreement between you (either an individual or a single entity) and PauTeCom Technologies, the sole owner and developer of the siNEt software ("Software").

By downloading, installing, or using the Software, you agree to be bound by the terms of this Agreement.

1. License Grant

PauTeCom Technologies grants you a limited, non-exclusive, non-transferable, revocable license to use the siNEt Software free of charge for personal, educational, or internal business purposes only.

2. Restrictions

You shall not:

Modify, alter, adapt, or create derivative works based on the Software.
Reverse engineer, decompile, disassemble, or attempt to extract the source code of the Software.
Reproduce, copy, distribute, sublicense, sell, rent, lease, publish, or commercially exploit the Software in any way.
Remove, alter, or obscure any proprietary notices or labels on the Software.
Use the Software in any unlawful manner or for any unlawful purpose.

Violation of any of the above is a breach of this agreement and will be treated as a serious legal offense.

3. Ownership

The Software is the sole intellectual property of PauTeCom Technologies. This Agreement does not grant you any ownership rights in the Software. All rights not expressly granted are reserved by PauTeCom Technologies.

4. No Warranty

The Software is provided "as is" without warranty of any kind, whether express, implied, or statutory, including but not limited to warranties of merchantability, fitness for a particular purpose, or non-infringement.

5. Limitation of Liability

In no event shall PauTeCom Technologies be liable for any damages (including, without limitation, lost profits, loss of data, or business interruption) arising out of the use or inability to use the Software.

6. Legal Enforcement

Any individual or organization found to be in violation of this Agreement—including but not limited to unauthorized redistribution, modification, resale, or reverse engineering—will face legal action under applicable intellectual property and software protection laws. PauTeCom Technologies reserves the right to pursue all legal remedies available, including civil lawsuits and criminal prosecution.

7. Termination

This license is effective until terminated. Your rights under this license will automatically terminate without notice if you fail to comply with any term of this Agreement. Upon termination, you must cease all use and destroy all copies of the Software.

8. Governing Law

This Agreement shall be governed by and construed in accordance with the laws of the jurisdiction in which PauTeCom Technologies is registered.

Acceptance

By using the siNEt Software, you acknowledge that you have read and understood this Agreement, and agree to be bound by its terms and conditions.